Ingredients:
-
-
+ For garlic knots: crushed garlic cloves + melted butter
+ some more milk for brushing
Directions:
Proof the yeast by stirring it vigorously with warm water and sugar in a small bowl (water ca. 37-45 degrees Celsius). Cover the bowl with a towel and leave it for up to 10 minutes until it has a frothy top.
Mix the yeast with all ingredients other than the flour. Sift in the flower while mixing - making sure you don’t work the dough too hard or too long or you will struggle to make it rise later. Cover bowl with towel and leave in a warm place (no drafts) to rise to twice its original size. Rule of thumb is to leave it to rise for max 3 hours. If it still hasn’t risen your yeast was probably “dead” before you started or you used too hot water to proof it thereby “killing” it. Divide dough into about 25-35 pieces depending on preferred size.
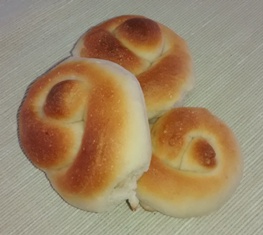
Roll each piece into to a smooth bun shape. Sometimes we make them into knots instead of plain rolls by rolling strips of dough and folding them into a knot (see photo below). For a flavourful twist, we sometimes flatten the the strips with a rolling pin and spread a mix of garlic and butter on them using a brush. Then we roll up the strips and shape them into knots again (see photo).
Place rolls/knots on a greased or non-stick baking sheet. We like when the rolls/knots batch or rise to touch each other so place them quite close together. Cover with a towel. Preheat oven to 250 degrees Celsius. For second rising, leave them for at least 30 minutes in a warm place (no drafts). Brush the rolls with room-temperature milk and bake in the middle of the oven for 8-10 minutes until light brown.
Enjoy, and keep in mind that these can be frozen for future enjoyment…
Photos:
Spreading garlic/butter mix on dough - before tying them in knots!

The only knots left the next day…
Recipe feeds 6 normal people or 4 very hungry people
“Pino” (ground beef filling)
Ingredients:
- 500 grams ground beef (low fat is best)
- 3 onions (see note 1)
- 3 cloves of garlic
- A little bit of cooking oil
- Salt and cumin to taste
- Raisins, soaked in hot water
- Olives
- 2 hard-boiled eggs, divide each egg into 4 segments
- 6 small pieces of chicken
Preparation:
- Chop onion and garlic finely.
- Heat a little oil in a frying pan; add the onion and garlic and fry for a few minutes.
- Add the ground beef to the frying pan and cook over low heat until the meat is no longer red. Stir regularly.
- Add salt and cumin to taste. (see Note 2)
- Put the prepared “pino” in an oven proof dish.
- Boil the chicken in water with salt and some herbs such as bay leaves or other herbs you have on hand.
- In your mind, divide the ovenproof dish into desired portions sizes (for instance six if you have six portions for chicken – but you can make each portion smaller or larger as you wish) and within the (imagined boundaries of each) portion place a piece of chicken together with a piece of egg, an olive and some raisins.
- Next – prepare the corn paste.
———
Corn Paste Topping
Ingredients:
- 6 fresh ears of corn or 2 cans of corn (see note 3)
- Several leaves of fresh basil (see note 4)
- Sugar
Preparation:
- Remember to pre-heat the oven to 200 °C (see note 5)
- If using fresh corn, carefully cut the corn from the cob.
- If using cans of corn and the can has a lot of liquid in it, let it drain.
- Put the corn and the basil in a blender and puree the mix.
- If you used fresh corn, you need to put the corn and basil mix in a pan and let it simmer on low heat for a few minutes. You can skip this step if you use canned corn as that corn has already been cooked.
- Place the corn paste on top of the “pino“, chicken, olives, egg and raisins that you previously placed in the ovenproof dish.
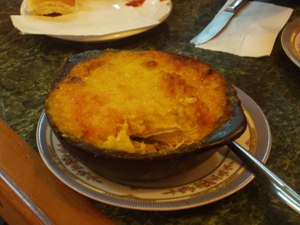
- Spread the corn paste evenly to make a pretty cover for the dish. Sprinkle with some sugar to help give it a prettier color after baking.
- Put the dish in the oven and cook till the corn starts to brown on the top and around the edges. Remember that all ingredients have already been fully cooked, so you are really just warming it up and making the flavors mix together.
Notes and Comments:
Note 1 – I am not a fan of a lot of onion so I use about one onion and lots of green onions (spring onions) instead as they have a gentler flavor, but this depends on your own preferences.
Note 2 – Sometimes I also add paprika powder to give the “pino” a nicer color.
Note 3 – The recipe calls for 2 cans of corn. The cans in Chile are much larger than in Norway and I would recommend using at least 4 Norwegian sized cans. I love the corn paste topping so the truth is I usually use even more corn than that, but once you try the recipe you will figure out how much corn you prefer to use. There should be enough corn paste to at least cover the “pino”, chicken, eggs etc…
Note 4 – The taste will be best if you can use fresh basil for this recipe, but I know that may be hard to find in Norway so then you can use the dry basil (basilikum) that they sell in the herb and spice section of the supermarket.
Note 5 – The oven temperature may vary depending on the oven. It should be quite high, but if it starts burning, try a lower temperature such as 180 °C.
General comments: If you do not like the raisins or olives, these can be left out. You can also reduce the amount of garlic if your guests do not care much for garlic. Also, the Chileans will normally have pieces of chicken in this dish but this can also be left out if you prefer a simpler version. The Chilean food is generally not spicy, but if you want to add some “kick” to the dish you can definitely add a little chili powder, but not too much because it would overpower the sweet flavor of the corn.
Posted by: Hild @ 8:32 am
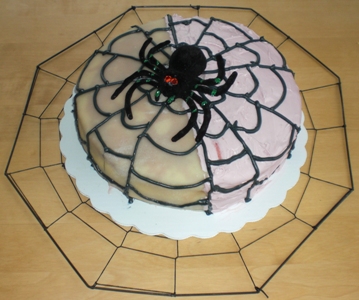
We love blautkake. This yummy Norwegian layer cake can be decorated for any special occasion and we had a Halloween party coming up. For us, a blautkake should have whipped cream filling and a marzipan cover. Hild had the idea that this time she wanted to make a half-and-half cake with a marzipan cover on one half of the cake and a more common (in North America) icing cover on the other half. The other part of the idea was to decorate it with a cobweb pattern and a huge big spider.
Note that “blautkake” translated directly from Norwegian means “soft cake” although Rob prefers to translate it as “soggy cake”. The soggier the better - to a point. Ho-hum.
Sponge Ingredients (for one 20 cm diameter cake with three layers):
- 4 large eggs
- 2 dl sugar
- 1 dl potato flour (I used corn flour and it turned out OK)
- 1 dl plain flour
- 2 teaspoons baking powder
- melted butter to grease the tin
Decorations:
- 2.5 dl whipping cream
- 1 dl Ribena juice (or more for more blood-effect. In Norway we would have used “husholdningssaft”)
- 1.5 dl seedless strawberry jam (or more for more blood-effect)
- 2.5 dl mandarin wedges in fruit juice (or more for more bits-of-brain-effect)
- 100 gr marzipan (200 gr for complete cake cover)
- 2 dl ready-made spreadable icing (or double the amount if you do not plan for a marzipan cover)
- 2 dl icing sugar
- food and icing colouring (yellow and black would be best for our party but we only had red and black)
Directions:
Pre-heat the oven to 200 celsius. Whisk eggs and sugar until it thickens. Carefully fold in a mix of potato flour, flour, and baking powder. Fold for an even mix but as little as possible. Melt butter and grease the tin (or use any other way of greasing the tin). Pour the mix into the tin and place it on the middle oven rack. Bake it for 25-35 minutes until it is ligth brown on the outside and baked through. Leave the cake to cool for a few minutes and remove it from the tin. When the cake has cooled down, cut it into three even layers.
This is when one can try different things to decorate the cake evey time. We prepared our layers like this:
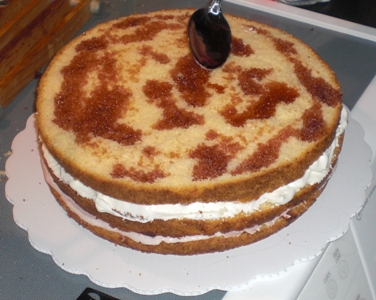
- Douse the bottom layer with Ribena. We should have used more to make the cake look more “bloody” for Halloween. Whip the cream until it thickens. Cover the layer in a mix of some of the whipped cream and strawberry jam.
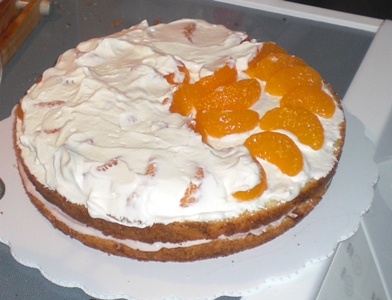
- Put the second layer on top of the cream/jam layer. To make the middle layer moist, douse it with juice from the mandarins. Spread whipped cream on this layer, spread a layer of mandarin wedges and another layer of whipped cream.
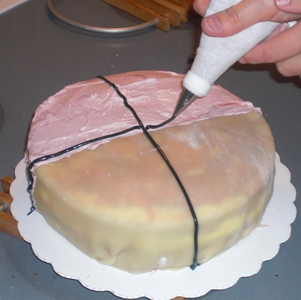
- Put the top cake layer on and douse it with Ribena. Spread strawberry jam over the layer and another layer of whipped cream before covering the cake with marzipan. We only covered half the cake in marzipan. On the other half we spread the ready-made icing (vanilla flavour with some of our own red colouring. If we had had yellow colouring we could have gotten a more fun orange Hallween colour).
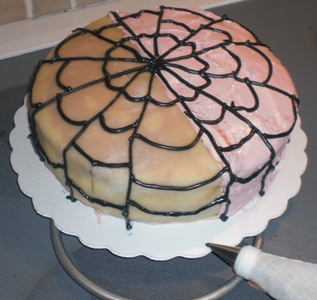
To make the cobweb effect we mixed icing sugar with black food colouring and some water. Note of caution: don’t overdo the colouring unless you want your guests to go home with black mouths and lips! We had planned to find an edible chocolate spider for extra decoration, but we weren’t able to find one. So the one in the final photos below is fake fake fake. The cake was definitely nam nam. Keep in mind that leaving any left-over cake covered in the fridge overnight does NOT make it any less nam nam!
Photos:
1. Dousing the second layer
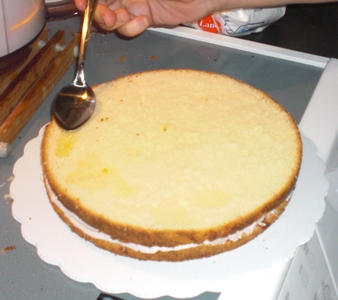
2. Mandarins in the second layer
3. Dousing the top layer
4. Cobweb icing on marzipan and icing top
5. Finished cobweb icing
6. Spider guarding the cake.
This weekend we wanted to have a ploughman’s lunch in stead of dinner. We were trying to save space for Thanksgiving-level eating the rest of the weekend (Happy Thanksgiving, Canada!). Our neighbour brought the cheese and wine and we supplied a range of cold sandwich meats, smoked salmon, and various vegetables. The final item was bread…. so why not make a damper, we thought. We dug out the first damper recipe we got while living in Australia. It isn’t very authentic as the stockmen in the outback would not have carted around potatoes, butter or Italian herbs. It is also unlikely that they would have had access to milking cows. How about milking camels? (ho-hum):
Ingredients (size = 25 cm diameter):
- 1 cup mashed potatoes
- 3 cups self raising flour (or add baking powder to plain flour)
- 2 tablespoons Italian herbs (f.ex. mix of dried oregano, basil, garlic, bell peppers, onion, salt, sugar)
- 1/4 teaspoon salt (unless there is salt in the herb mixture)
- 1/2 teaspoon pepper (unless there is pepper in the herb mixture)
- 2 teaspoons butter/margarine (maybe use this to make the mashed potatoes?)
- 1/2 cup of skim milk
Directions:
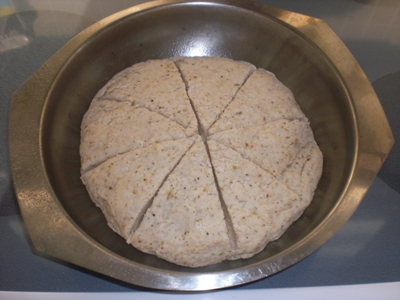
Preheat oven to 220 degrees Celsius. Mix flour, herbs, salt, and pepper. If you didn’t use butter/margarine to make the mashed potatoes, use your hands to rub the butter/margarine into the flour mixture. Stir in the mashed potatoes and enough skim milk to make a sticky dough. Use hands to knead the dough until it is smooth. We often make it round and cut two 1.5 cm deep cuts in it to divide the loaf into 8 pieces before baking.
Bake at 220 degrees Celsius for 10 minutes. Turn down the temperature to 180 degrees Celsius. It is a good idea to let the hot air out to cool the oven quicker. Bake for 30-35 minutes. Tap the bottom of the loaf. It is done if it sounds hollow. Let the loaf rest before cutting. Cut into wedges and serve - for example with a ploughman’s lunch.
Here is a before photo:
And as usual we forgot to take the after photo and there was only one small wedge left:

Another recipe from Janet’s (mum’s) collection. 10-øreskaker (with the current exchange rate to Canadian Dollars) translates to 2-cent cakes. This is not the cost of making or buying them anymore! Some may call them a sweet buttermilk scones. But I don’t know quite what to call them in English. Rest assured that they are delicious, and freeze well to be defrosted quickly in the microwave for that sudden urge for something sweet with your cup of tea or coffee or mug of milk.
Ingredients (120 cakes… so I often make half of this)
- 500 grams butter
- 1 litre butter milk
- 500 grams syrup (corn syrup worked well)
- 50 grams ammonium bicarbonate (sometimes sold as “harts horn” or in Norway - “hjortetakksalt”)
- 700 grams sugar
- ca. 1 litre plain flour
Directions
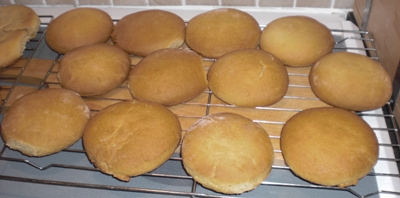
Preheat oven to 220 degrees celsius. Mix milk, melted butter and warm syrup. Add the dry ingredients. Add flour gradually until the dough is firm enough to be rolled with a rolling pin. Use a glass or a large cookie cutter to cut the cakes from the rolled-out dough. We choose a smaller glass to make the cakes more to our preferred snack-size (see photo). Put on baking sheet above the middle of the oven and bake for 7-9 minutes. Leave cakes to cool down. Serve as is or with a bit of butter/spread and maybe even a slice of Jarlsberg cheese brunost (goat cheese sometimes sold in North America as “Skiqueen”) and/or jam. Nam Nam.
Note that we have struggled to find ammonium bicarbonate outside Europe, but yesterday we stumbled across it in one of the Loblaws grocery shops here in Ottawa. It is sold in a small 30 gram plastic container with screw-top lid and our excuse is that it was partially hidden behind a large box of baking soda. In desperation we have in fact tried to make 10-øreskaker using baking soda and baking powder, but they don’t produce that nice fluffy middle, and there is often a not so charming taste of baking soda. Be warned that baking with ammonium bicarbonate does NOT make for a yummy dough to nibble before baking (bummer) - and it makes for smelly fumes in the kitchen so keep your windows open. Also, don’t open the oven door and stick your head too close to check out how they are doing… the fumes are quite unpleasant. Luckily the smell dissipates quickly leaving only delicious fluffy snacks. Enjoy!
Photo 1: Cutting the cakes
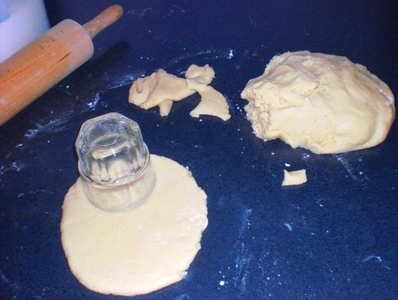
Photo 2: Ready for snacking!