This is one of our all-time favourite Saturday afternoon dinners. In Norwegian it is called “Makaroni og skinke grateng” - meaning “au gratin” as in covered with bread cumbs (not cheese this time) and browned. Tasty and quick to make - and the ingredients are all common things that we typically have in our fridge already. That means that lazy Hild and Rob didn’t have to make the 5 minute trip across the road to the 24 hour supermaket to buy anything special! So here we go - recipe kindly shared by Janet:
Ingredients (we divided the original recipe by 2 to feed two people)
- 60 grams macaroni
- 6 dl milk
- 1/8 teaspoon ground nutmeg
- 1/8 teaspoon ground pepper
- 1 egg
- 125 grams cubed ham, cubed bacon, or even better: cubed smoked lamb
- A sprinkle of bread crumbs
Directions
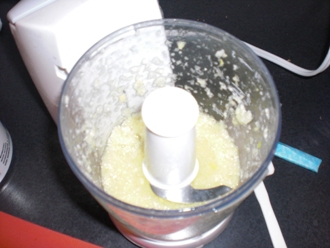
Cook macaroni in the milk until the macaroni goes soft. Hild was stirring constantly in fear of burning the milk, but this could be to excessive. We invite you to try without all the stirring… Then one was supposed to let the macaroni and milk cool down, but as usual Rob and Hild were not prepared to wait. So we mixed in the egg yolk, nutmeg, and pepper. If we had managed to find proper smoked lamb we would have used that, but we mixed in cubed bacon in stead. Then we should have whisked the egg white and folded it into the mix. But our mixer wasn’t cooperating so we just added a stirred egg white to the mix. The end results was OK but not as “fluffy” as it was supposed to be. We poured the mix into an oven proof dish (21 x 14 cm) and sprinkled bread crumbs on top. The dish went on the middle rack in the oven at 180 degrees Celsius for 40-45 minutes.
Afterthought: If we had whipped the egg white properly, we may have needed a bigger dish!
At home we used to serve this with melted butter and a salad. This time we didn’t feel like a salad so we had tomato ketchup in stead. It was nam nam. Hild forgot to take photos (sorry).
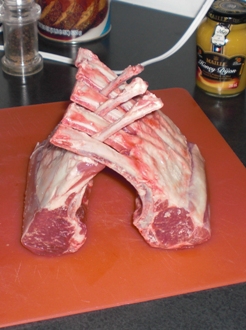
After having a really nice rack (of lamb) at a hotel a week or so ago, we found some nice lamb in Costco so I dug around on the internet for decent-looking recipe. There were quite a few - all generally similar, but with their own quirks. So I sort of combined the general approach with what sounded good to me. This is not really much different to any standard recipe, but we enjoyed cooking it - and eating it afterwards!
Ingredients (2 people)
-
1/2 cup fresh bread crumbs
-
2/3 cloves of garlic (peeled)
-
2 teaspoons dried rosemary
-
2 teaspoons dried sage
-
1 teaspoon salt
-
1/4 teaspoon black pepper
-
2 tablespoons olive oil
-
1 (8 bone) rack of lamb, trimmed and frenched
- 2 tablespoons olive oil
-
2 tablespoons honey
Dijon mustard
Directions
Chuck the breadcrumbs, garlic, herbs, salt and pepper into a blender and blend for 20-30 seconds until the garlic is well minced. Add a couple tablespoons of olive oil and blend again so the breadcrumb mixture is moist.
Photo: Rack cut and stood up - as it will be in the oven
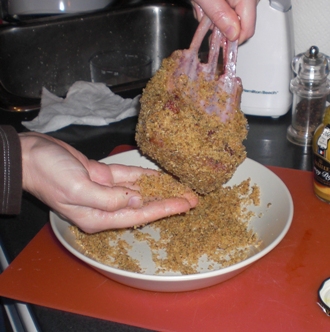
I cut the rack of lamb into two similar sized pieces so that they would be easier to cook and serve and then seared the sides in the rest of the olive oil in a heavy frying pan. Go round all sides of the rack, except the bones, and get some colour on the meat. Then brush the lamb with the honey mustard, making sure it is well covered, before coating the lamb in the breadcrumb mixture.
Photo: Brushing lamb with mustard….
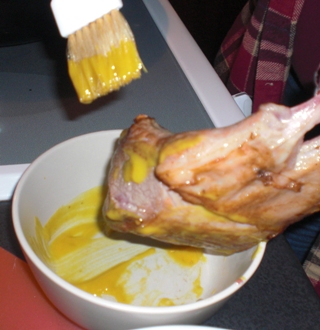
Photo: …and coating with breadcrumbs
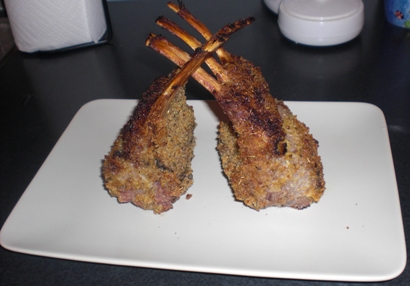
Arrange the racks standing up by interleaving the end of the bones in a heavy oven dish. If the frying pan is oven proof, people often use that. You can also put the racks bone side down if they have not been “frenched”, i.e. if the ends of the bone have not been exposed. Cook the racks in a very hot oven - 450 F (230 C) and make sure the oven is hot before you put the lamb in. Cook for about 20 minutes for rare or use a meat thermometer - 135 F came out pretty rare and we like it that way.
Photo: Out of the oven - ready to eat
The recipes all say to let it rest for at least five minutes before eating - some say to rest it even longer (up to 15 minutes). They are certainly hot at this stage so it might make sense just for that. The cleaned bones make this easy to eat with your fingers after you cut them - they are usually served cut down between the the bones. There is usually some kind of sauce as well - a red-wine reduction is common if you want to go that far. Hild made a nice mushroom sauce and we had potatoes, carrots and turnip chunks roasted in olive oil - yummy!
Hild and I fancied something a bit different and they didn’t have any re-heat Indian food in the shop so I got “volunteered” to make Rogan Josh - red lamb stew. Since we were already in the shop at the time, I had to guess what we needed, but apart from ginger, garlic and onions (and the lamb) we had all of the spices so we were good to go. I thought it would take quite a while, but actually it was only about an hour and a half so it worked well. This recipe comes from a book by Madhur Jaffrey - a TV cook from the UK.
Ingredients (2 people)
- 6 cloves of garlic
- 2 x 1 inch cubes of peeled ginger
- vegetable oil (for frying)
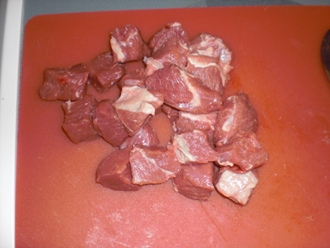
- 300 grams lamb (1 leg chop) cut into 1 cm cubes
- 10 whole cardamom pods
- 2 bay leaves
- 6 whole cloves
- 10 peppercorns
- 2 inches of cinnamon stick
- 2 medium sized onions, finely chopped
- 1 teaspoon ground coriander seeds
- 2 teaspoons ground cumin
- 6 teaspoons red paprika
- 1 teaspoon salt
- 6 tablespoons plain yoghurt
Directions
This looks like a long list, but it gets used in chunks so I will explain in steps.
Mince garlic cloves and ginger in blender with enough water to make a paste. It doesn’t have to be smooth, but this is a good way to get it pretty finely chopped as you don’t want bits in the final dish.
Photo: minced garlic and ginger
Brown the cubes of lamb in the vegetable oil in a heavy pan over a medium high heat. It is good if the pan is wide because a lot of stuff gets fried in here, but it isn’t then end of the world if not. Remove the browned lamb cubes and keep them (and the juices which come out of them) for later.
Photo: cubed lamb - before browning
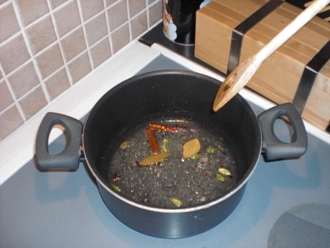
Keep the oil pretty hot and throw in all of the whole spices (cardamom, bay leaves, cloves, cinnamon and peppercorns) for a few seconds until they swell and the bay leaf begins to brown. This probably only takes 15-20 seconds so be ready with the next ingredients.
Photo: whole spices
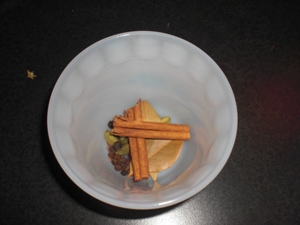
Photo: frying whole spices
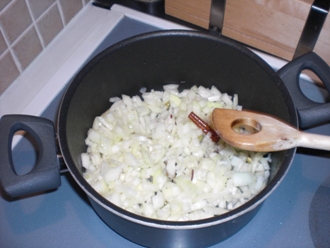
Add the chopped onions and fry these for a good five minutes. This is Indian food so the onion is supposed to get brown - this gives colour to the dish as well as adding to the flavour.
Photo: frying onions - let them get a lot browner than this before the next step
Add the garlic/ginger paste and fry for about a minute. Once again, a bit of colour doesn’t do any harm.
Add the ground spices (cumin, coriander and paprika) and salt and fry this for another minute. Things get quite sticky now, but don’t worry if bits stick to the bottom of the pan because this builds the flavour. This does not come out too spicy as the paprika we used is pretty mild. Be careful not to replace paprika with chilli powder - they aren’t the same! You can spice this up with some chilli powder or tabasco sauce, but I think it shouldn’t be too hot or you lose the other spice flavours.
Add the lamb and any juices which came out of them and fry these for a minute to get them well coated in the onion/spice mixture.
Add the yoghurt one tablespoon at a time, mixing each one in well. The idea here is to blend this in without it separating, it probably won’t work perfectly, but it doesn’t affect the flavour. Once it is all mixed in, stir fry for another couple of minutes, then add about 1/2 a pint of water to make quite a thin sauce. This reduces as it cooks and the onions thicken it.
Photo: simmering
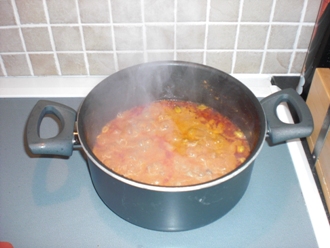
After this comes to a boil cover with a lid, reduce the heat and simmer for about an hour. Then bring it back up to the boil to reduce the sauce (if needed) until it is quite thick. While you are reducing the sauce, this is a good time to prepare rice or whatever you are having (naan bread is good). Hild makes great basmati rice so I’ll add her recipe here (and claim the credit).
Basmati rice (boiled)
Rinse 1 cup of basmati rice in cold water, then put it into a pan (with a decent lid). Add 2 cups of boiling water and one teaspoon of salt and bring to boil. Then put the lid on the pan and turn the heat down to minimum setting for 10 minutes. After 10 minutes, remove the pan from the hot plate, stir the rice once and put the lid back on for another 10 minutes.
Raita
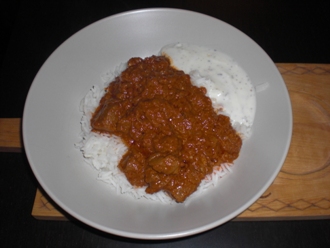
As a relish, we made our own raita with plain yoghurt and concentrated mint sauce - 1 teaspoon of mint sauce into 7 or 8 of yoghurt. The concentrated mint we have already has a lot of sugar, but you might like to sweeten it if you can’t get this as the slightly sweet yoghurt can tone down the spices. Sometimes we grate cucumber into this, but not tonight.
Photo: finished article - ready to eat
A quick note: The whole spices get left in during the cooking, but you can take them out before serving/eating. The bay leaves and cinnamon are easy to find, but the cardamom pods and whole peppercorns are a bit more difficult. Just warn your guests to look out for them!
We hadn’t planned to make a Norwegian Christmas dish this year but then, after a chat with both Adelheid and Kristin, we changed our mind. We ran to the butcher down the street to see what he could do for us in terms of salted and smoked meat. While we secretly hoped for lamb, we struck out and came out with a partial leg of pork (as expected).
Ingredients (4-6 people):
-
600 grams salted and smoked ham on the bone (should have been lamb, but such is life)
-
2.5 litres of water
-
600 grams rutabaga peeled and cut into slices about 1cm thick (yellow turnip)
-
1 litre skim milk
-
7 tablespoons of plain flour
-
However many lefse (soft tortillas) you plan to eat
-
Optional depending on taste: one Knorr stock cube any flavour
-
Optional depending on taste: 1 tsp salt
-
Optional: However many of boiled potatoes you plan to eat
Directions:
Boil water in kettle and transfer to pan. Put ham (or lamb) in the water and boil for 2.5 hours. When ca. 40 minutes remain, add the sliced rutabaga to the pan. When the rutabaga is cooked, remove the meat and the rutabaga and keep them warm until serving. Mix the flour into the cold milk and add to the pan. Boil the soup for about 10 minutes longer. Add stock cube and/or salt to taste.
Serve hot soup in a bowl and - if you are not uncouth - meat, rutabaga, lefse, and potatoes on a side plate. Rob and Hild have no couth and therefore add everything to the soup bowl and even dip their lefse in the soup! Honestly, how bad can they get?!
Photo: The meat boiling in the pan
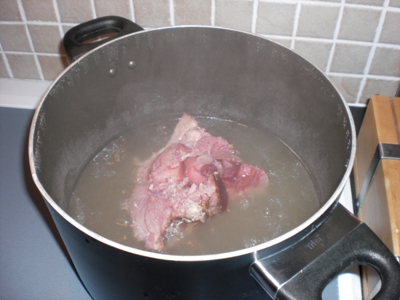
Photo: The sliced rutabaga added to the pan
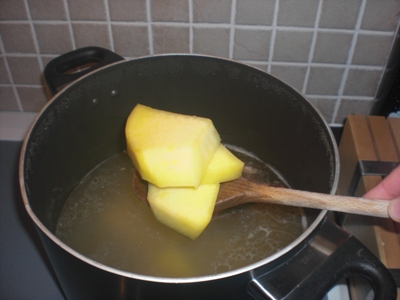
Photo: The milk has been added - nepespa nearly ready
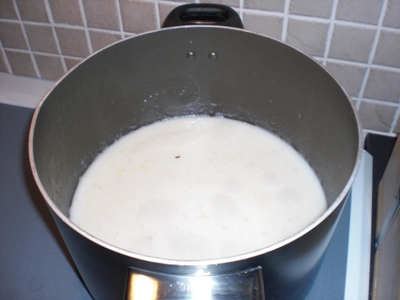
Photo: Dinner is ready!
