Posted by: Hild @ 8:32 am
We love blautkake. This yummy Norwegian layer cake can be decorated for any special occasion and we had a Halloween party coming up. For us, a blautkake should have whipped cream filling and a marzipan cover. Hild had the idea that this time she wanted to make a half-and-half cake with a marzipan cover on one half of the cake and a more common (in North America) icing cover on the other half. The other part of the idea was to decorate it with a cobweb pattern and a huge big spider.
Note that “blautkake” translated directly from Norwegian means “soft cake” although Rob prefers to translate it as “soggy cake”. The soggier the better - to a point. Ho-hum.
Sponge Ingredients (for one 20 cm diameter cake with three layers):
- 4 large eggs
- 2 dl sugar
- 1 dl potato flour (I used corn flour and it turned out OK)
- 1 dl plain flour
- 2 teaspoons baking powder
- melted butter to grease the tin
Decorations:
- 2.5 dl whipping cream
- 1 dl Ribena juice (or more for more blood-effect. In Norway we would have used “husholdningssaft”)
- 1.5 dl seedless strawberry jam (or more for more blood-effect)
- 2.5 dl mandarin wedges in fruit juice (or more for more bits-of-brain-effect)
- 100 gr marzipan (200 gr for complete cake cover)
- 2 dl ready-made spreadable icing (or double the amount if you do not plan for a marzipan cover)
- 2 dl icing sugar
- food and icing colouring (yellow and black would be best for our party but we only had red and black)
Directions:
Pre-heat the oven to 200 celsius. Whisk eggs and sugar until it thickens. Carefully fold in a mix of potato flour, flour, and baking powder. Fold for an even mix but as little as possible. Melt butter and grease the tin (or use any other way of greasing the tin). Pour the mix into the tin and place it on the middle oven rack. Bake it for 25-35 minutes until it is ligth brown on the outside and baked through. Leave the cake to cool for a few minutes and remove it from the tin. When the cake has cooled down, cut it into three even layers.
This is when one can try different things to decorate the cake evey time. We prepared our layers like this:
- Douse the bottom layer with Ribena. We should have used more to make the cake look more “bloody” for Halloween. Whip the cream until it thickens. Cover the layer in a mix of some of the whipped cream and strawberry jam.
- Put the second layer on top of the cream/jam layer. To make the middle layer moist, douse it with juice from the mandarins. Spread whipped cream on this layer, spread a layer of mandarin wedges and another layer of whipped cream.
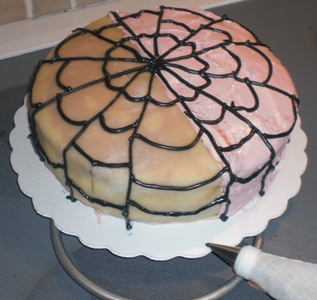
- Put the top cake layer on and douse it with Ribena. Spread strawberry jam over the layer and another layer of whipped cream before covering the cake with marzipan. We only covered half the cake in marzipan. On the other half we spread the ready-made icing (vanilla flavour with some of our own red colouring. If we had had yellow colouring we could have gotten a more fun orange Hallween colour).
To make the cobweb effect we mixed icing sugar with black food colouring and some water. Note of caution: don’t overdo the colouring unless you want your guests to go home with black mouths and lips! We had planned to find an edible chocolate spider for extra decoration, but we weren’t able to find one. So the one in the final photos below is fake fake fake. The cake was definitely nam nam. Keep in mind that leaving any left-over cake covered in the fridge overnight does NOT make it any less nam nam!
Photos:
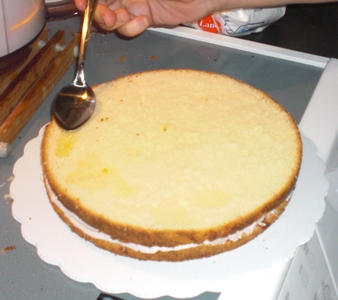
1. Dousing the second layer
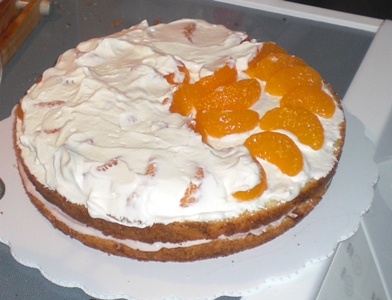
2. Mandarins in the second layer
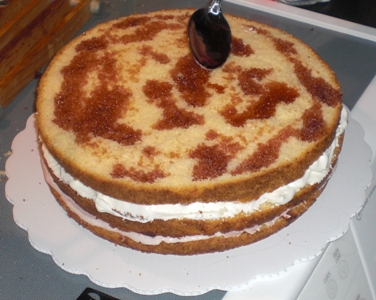
3. Dousing the top layer
4. Cobweb icing on marzipan and icing top
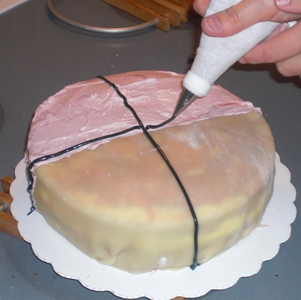
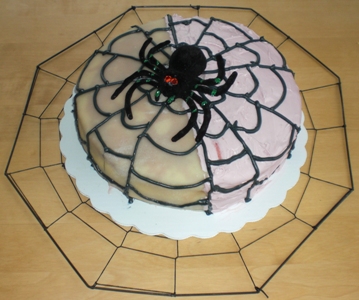
5. Finished cobweb icing
6. Spider guarding the cake.
While we Norwegians typically only have kransekake at Christmas and big parties such as weddings and confirmations, a kransekake is a great cake for all occasions and it looks good to boot. We have experienced bringing it to parties and finding that no one was eating it because people thought it was a center piece for decoration only! So now we always explain to people at the start how to serve the cake to maintain its nice shape as it gets eaten. To para-phrase Joss Whedon: You eat it starting with its bottom (7th season of “Buffy The Vampire Slayer” mis-translation of the ominous warning “Desde abajo te devora” or “From beneath you it devours”).
Anyway, I digress and should get back to the recipe. Note that you’ll need special tins to make a traditionally shaped cake. If you don’t have the tins you will have to experiment with other shaped tins.
Ingredients (for one 18 rings high cake)
-
500 grams almonds (not roasted and with skins on)
-
500 grams icing sugar
-
3 table spoons plain flour
-
3-4 egg whites (one egg = ca. 50 gram)
-
Cooking spray
-
Semolina flour
-
Icing sugar and water mixture for assembling the cake
Directions
Grind the almonds in a hand driven or slow grinder. Warning: Fast speeds on normal kitchen machines makes for flat and non-chewy cakes. Mix ground almonds with icing sugar and flour. Add one egg white at a time until the dough so that you can roll it into a long “sausage”. It takes some practice to find the right thickness but you’ll have to make all 18 rings for the cake.
Spray the baking tins and dust them lightly with semolina flour. This will help you get the cakes out of the tins when they are done. Cut the rolled out dough to fill all 18 rings. Bake the rings/cake at 210 Celsius for 10-12 minutes. The rings should have a very light brown colour when they are done. Leave the rings in the tins until they have cooled off otherwise they’ll break when you try to remove them.
Mix icing sugar and water to a consistency that you can use piping bags to assemble the cake. Start with the largest ring, pipe icing sugar mix in a zig zag pattern around the ring, put the smaller ring on top and continue the process until the 18 rings have been assembled.
To store the cake, keep it in an airtight container. If it dries out, put a few slices of bread or halved raw potatoes in the container for a few hours with the cake. This will make it moist and chewy again. Make sure the bread or potatoes don’t touch the cake making it soggy. We also like to freeze left-over kransekake rings because they defrost in a few seconds in the micro wave and are very chewy afterwards.
PS: Rob still believes that all kransekaker should have 17 rings because you always eat the biggest/bottom ring to make sure that it is chewy and nice for the guests…
Some Photos:
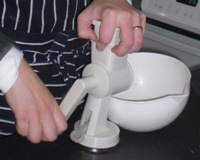
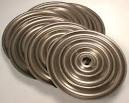
Photos: Grinding almonds by hand + special kransekake tins w/ 3 rings per 6 tins.
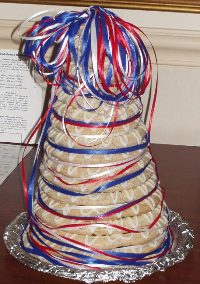
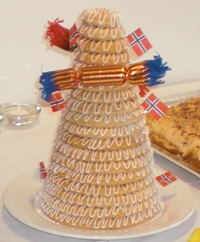
Photo: Cake decorated for a birthday - and one more traditional style for a confirmation.
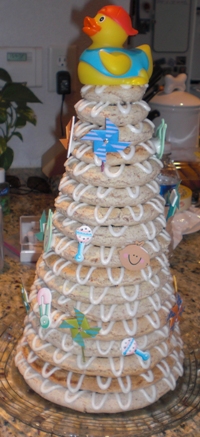
Photo: Cake decorated for a baby shower
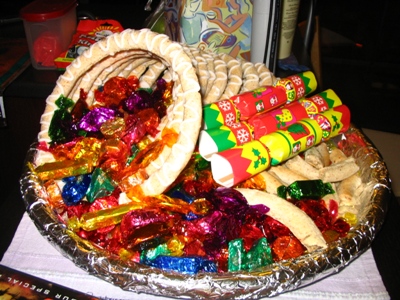
Photo: Cake decorated as a cornucopia with our favourite chocolates (Quality Street)
We hadn’t planned to make a Norwegian Christmas dish this year but then, after a chat with both Adelheid and Kristin, we changed our mind. We ran to the butcher down the street to see what he could do for us in terms of salted and smoked meat. While we secretly hoped for lamb, we struck out and came out with a partial leg of pork (as expected).
Ingredients (4-6 people):
-
600 grams salted and smoked ham on the bone (should have been lamb, but such is life)
-
2.5 litres of water
-
600 grams rutabaga peeled and cut into slices about 1cm thick (yellow turnip)
-
1 litre skim milk
-
7 tablespoons of plain flour
-
However many lefse (soft tortillas) you plan to eat
-
Optional depending on taste: one Knorr stock cube any flavour
-
Optional depending on taste: 1 tsp salt
-
Optional: However many of boiled potatoes you plan to eat
Directions:
Boil water in kettle and transfer to pan. Put ham (or lamb) in the water and boil for 2.5 hours. When ca. 40 minutes remain, add the sliced rutabaga to the pan. When the rutabaga is cooked, remove the meat and the rutabaga and keep them warm until serving. Mix the flour into the cold milk and add to the pan. Boil the soup for about 10 minutes longer. Add stock cube and/or salt to taste.
Serve hot soup in a bowl and - if you are not uncouth - meat, rutabaga, lefse, and potatoes on a side plate. Rob and Hild have no couth and therefore add everything to the soup bowl and even dip their lefse in the soup! Honestly, how bad can they get?!
Photo: The meat boiling in the pan
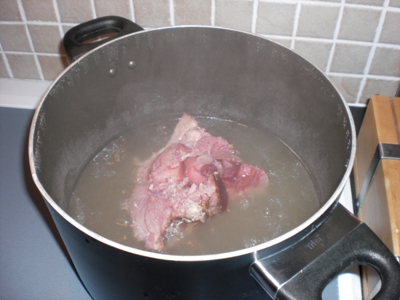
Photo: The sliced rutabaga added to the pan
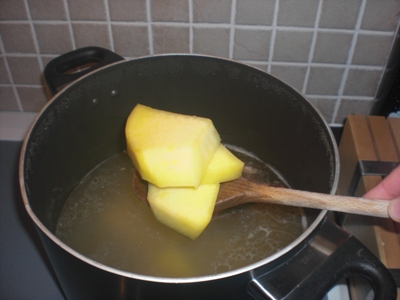
Photo: The milk has been added - nepespa nearly ready
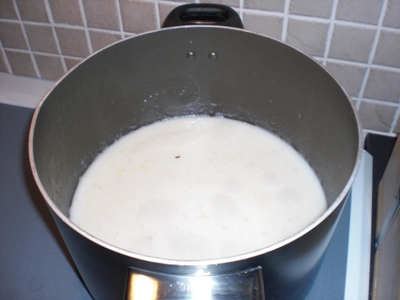
Photo: Dinner is ready!

Butter Tarts
a la Norah and her mum
Thanks to Norah and her mum for sharing this recipe with us. We should after all try something really Canadian! We classify them as ‘for Christmas’ because it made us feel all ‘Christmassy’ when we ate them…
Ingredients:
-
1/3 cup butter, softened
-
1 cup light brown sugar
-
1 egg
-
1 tsp vanilla essence
-
1/2 cup raisings
-
1/2 cup currants
-
Optional: chopped walnuts
-
1 dozen regular or 2 dozen mini uncooked frozen tart shells
We chose to make our own short crust pastry as we were too lazy to run across the road to the supermarket for the frozen tart shells (blush). Recipe from Delia Smith’s cook book:
-
110 g flour
-
50 g of butter at room temperature (should have been 50/50 margarine and lard but we were clean out of that!)
-
a pinch of salt
-
cold water from the fridge to mix (4-5 table spoons)
Directions:
Pastry dough
1. Crumble the flour and butter and salt evenly together. Do it quickly - i.e. don’t mess with it for too long.
2. Add water to make a consistency that can be rolled out.
3. Let the dough rest for 15 minutes or so
Filling (while pastry dough rests)
4. Preheat oven to 205 degrees Celsius
5. Cream butter and brown sugar
6. Add egg and vanilla
7. Stir in raisins and currants (and optional chopped walnuts)
Pastry shells
8. Roll the pastry dough thinly and cut circles to fit the tins.
9. Make 14-16 shells. Because our shells were 6.5 cm in diameter we had too much filling for the 12 we made. Being new at this we therefore overfilled them the filling came over the top when they were baked.
10. Divide filling evenly among tart shells.
11. Bake for 15 minutes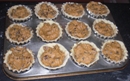
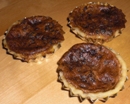
12. Remove from oven and cool on wire racks. We were terribly impatient and dug some out of their tins while still warm…. still gooey goodness!
Nam Nam - for sure.
Posole
Here is how to make a Nam Nam (yummy) soup with great tasting stock, tender pork and fresh vegetables.
1. Mix the following ingredients in a large pot.
· 1.5 to 2 pounds of pork shoulder or roast
· 2 to 3 cups of canned or fresh hominy, rinsed
· 3 to 5 cloves of garlic
· 2 teaspoons salt
· 6 cups water or stock
2. Bring to a boil over medium-high heat, and then reduce heat to low and simmer for 1.5 to 2 hours, or until the meat is very tender.
3. Remove the pot from heat. Take the pork from pot and set aside to cool. When cool enough to handle, remove the meat from its bones and shred it with your hands.
4. Add the meat back to the pot and simmer for another 10 to 15 minutes. Adjust seasoning and serve with little bowls of your choice of garnishes so each diner can garnish his or her own serving.
5. Garnishes:
· Cabbage or iceberg lettuce, shredded
· Onion, finely diced
· Radishes, thinly sliced
· Limes, cut into wedges
· Avocado, diced
· Oregano, dried
· Chile piquín, ground
Source: www.whats4eats.com